
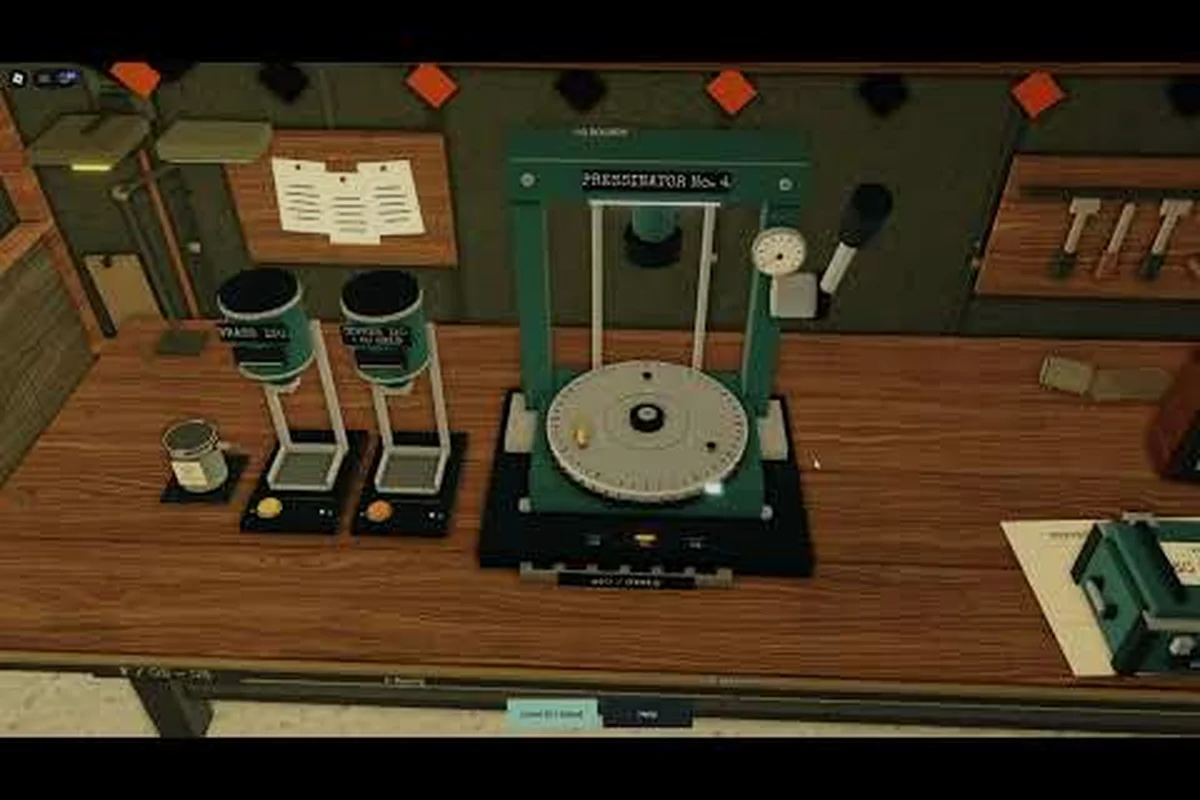
Learning how to unlock rounds in BRASS HELL is the single decision that shapes your entire shift economy, because every new ammo type you unlock changes what the press can output and what crates will accept. This guide maps the workshop milestones, upgrade costs, and ammo unlocks so you stop guessing which purchase actually moves your factory forward.
BRASS HELL is an early-access incremental factory simulator on Roblox from solo developer earlymoto102, launched October 4, 2026, and the official BRASS HELL page frames progression around upgrades rather than raw grinding. That means the real question is not "how many bullets can I pack" but "which unlock feeds the next milestone most directly." Get that order right and your production curve bends upward fast; get it wrong and you spend shifts hand-packing rounds that a single upgrade would have automated.
What the BRASS HELL Round Unlock System Actually Gates
The core gameplay takes place inside a snowbound ammo plant, where you work the press to pack rounds, fill crates, and deliver shipments while orders keep coming. Rounds are not a single resource — they are a ladder of ammo tiers, and each tier is gated behind workshop progress rather than playtime or level.
Community reports consistently describe the same pattern: the press starts manual, crates accept only basic ammunition, and every meaningful step up requires a workshop purchase first. That is why players searching for how to unlock ammo in BRASS HELL keep landing on the same answer — buy the workshop upgrade, then the round becomes craftable.
The unlock system is strictly linear and workshop-driven: each ammo tier is tied to a specific workshop upgrade node, and buying that node is the only way to make the corresponding round craftable at the press. There is no XP bar, no separate skill tree, and no currency shop that bypasses this — the workshop upgrades list doubles as your round unlock list. Because each tier has its own milestone, unlocking 9mm-equivalent basic rounds does nothing for the next tier up; you must clear that tier's own purchase before its ammo appears as a craftable option. Upgrade costs also scale sharply between milestones, so the gap between your first cheap purchase and a late-game tier is measured in accumulated crate shipments, not playtime.
-
Rounds unlock through workshop purchases, not through a separate skill tree or currency shop.
-
Each ammo tier has its own milestone, so unlocking one does not automatically unlock the next.
-
Crate orders gate your income, meaning a round you can craft but cannot ship is dead weight.
-
Upgrade costs scale, so early purchases are cheap and later milestones demand serious accumulated output.
-
Balance values shift between patches, since the game is in active early access.
The practical takeaway is that your workshop upgrades list is effectively your round unlock list. If you want to know which ammo you can produce next, look at what the workshop is offering rather than what the press menu shows.
Why the Press Menu Is Misleading
New players often open the press interface, see grayed-out round types, and assume they need to grind more bullets to unlock them. That reading is wrong. The grayed-out entries are locked behind workshop state, and no amount of manual packing will flip them. According to player experience shared in community gameplay runs, the fastest way to clear those locked icons is to bank cash and buy the next workshop tier instead of hoarding rounds.
The Crate Feedback Loop
Crates are the other half of the gate. A round type only becomes economically useful once crate orders start requesting it, and those orders tend to appear after the corresponding workshop upgrade. This creates a feedback loop where the workshop purchase unlocks both the ammo and the demand for it, which is why upgrade order matters more than raw production volume.
BRASS HELL Upgrade Costs and What Each Milestone Buys
Understanding BRASS HELL upgrade costs is the difference between a smooth progression curve and a stalled factory. Costs are not published in a single in-game table, so the numbers below reflect community-reported ranges as of the current early-access build and should be treated as approximate rather than exact.
| Milestone | Typical Cost Band | What It Unlocks | Priority |
|---|---|---|---|
| Press speed tier 1 | Low | Faster manual packing, first automation hint | High — buy first |
| Crate capacity tier 1 | Low | Larger shipments, steadier income | High — pairs with press speed |
| Basic ammo expansion | Low–mid | Second round type becomes craftable | High — first real unlock |
| Press automation | Mid | Reduces manual input per round | Very high — biggest time save |
| Ammo tier 2 unlock | Mid | New round type plus matching crate orders | Medium — depends on order flow |
| Crate capacity tier 2 | Mid | Bulk shipments, better payout per delivery | Medium |
| Ammo tier 3 unlock | High | Advanced rounds, higher value per unit | Medium–late |
| Press speed tier 2+ | High | Compounding output gains | Late |
The pattern worth internalizing is that press automation usually delivers more value per coin than any single ammo unlock, because it multiplies every round you produce afterward. Players who rush ammo tiers before automation often report feeling stuck — they can craft better bullets but cannot produce them fast enough to matter.
Because the game is early access, treat these bands as directional. The developer profile for earlymoto102 on Roblox reflects an actively patched project, and community testing suggests upgrade values get retuned between updates. If a cost looks different from what you expected, check whether a patch landed rather than assuming you misread the shop.
Reading the Workshop Upgrades List Correctly
The full BRASS HELL workshop upgrades list mixes three different categories of purchase — throughput, capacity, and unlock — and confusing them is a common early mistake: a player saves for what looks like a big-ticket unlock, only to find it does nothing until the matching crate orders rotate in. Before spending a single coin, check which category a node belongs to, because an unlock upgrade bought ahead of its crate order sits idle while throughput upgrades bought with the same money keep paying out every single press cycle.
-
Throughput upgrades raise how many rounds you produce per unit of time.
-
Capacity upgrades raise how much you can ship per delivery.
-
Unlock upgrades add new round types to the press and new orders to the crate board.
Throughput and capacity upgrades pay for themselves continuously, because every press cycle and every delivery converts them into coins. Unlock upgrades pay for themselves only once the matching crate orders appear, and until that rotation hits they contribute nothing to your income. That distinction should drive your buying order far more than the sticker price does: a cheap unlock that unlocks a new round type with no live order is still a dead purchase, while a pricier throughput node starts returning coins on the very next press. When you are deciding how to unlock new rounds efficiently, treat unlock upgrades as purchases to make only when their crate order is already on the board or imminent.
How to Unlock New Rounds Without Wasting Shifts
The cleanest route through BRASS HELL unlock new rounds progression follows a repeatable sequence rather than a fixed shopping list, because order flow varies between sessions. The sequence below is what community runs converge on, and it holds up whether you are ten minutes in or an hour deep.
-
Buy the cheapest throughput upgrade available. Early press speed tiers are inexpensive and immediately increase every subsequent round count.
-
Add crate capacity once shipments start feeling slow. If you are producing faster than you can ship, capacity is your bottleneck, not production.
-
Take the first ammo unlock as soon as it appears. The second round type usually arrives with matching crate orders, so it converts to income quickly.
-
Save for press automation before chasing higher ammo tiers. Automation compounds; a third ammo type does not.
-
Re-check the workshop after every patch. Early-access builds retune costs and unlock conditions regularly.
That fifth step is not filler. Because BRASS HELL shipped in October 2026 and remains in active development, the workshop can change between sessions. A purchase that was poor value last week may be the correct buy after a balance pass.
When to Ignore a Shiny Unlock
Not every ammo unlock deserves immediate attention. If the crate board is not requesting the new round type, buying it early just parks your cash in a press menu entry you cannot monetize. A useful habit is to scan the crate board first, note which round types are actually in demand, and then buy the workshop upgrade that matches that demand. This keeps your spending aligned with income rather than with the shop's visual appeal.
Tracking Your Own Payback
Because exact costs shift, the most reliable method is to measure payback yourself. Note your cash total, buy one upgrade, then count how many shipments it takes to recover that spend. Throughput and capacity upgrades typically pay back within a handful of deliveries; unlock upgrades pay back only after the matching orders cycle in. Keeping a rough mental tally of payback time will tell you more about your next purchase than any static tier list.
Choosing Your First Unlocks: A Practical Comparison
First-purchase decisions carry disproportionate weight because early cash is scarce, and a single wrong buy can stall your round output for several shifts before you recover. Before you spend a single coin, audit your current bottleneck: if you are hand-packing every round and the press queue never empties, press speed tier 1 pays for itself fastest; if finished rounds pile up at the loading dock while crates sit half-empty, crate capacity tier 1 is the better lever. The comparison below weighs the three most common opening buys — press speed, crate capacity, and your first ammo unlock — against each other using the criteria that actually matter during the first few shifts, with press automation included as the high-cost benchmark you are saving toward.
| Opening Purchase | Immediate Effect | Long-Term Value | Best When |
|---|---|---|---|
| Press speed tier 1 | More rounds per minute | Moderate — gets outscaled | You are hand-packing constantly |
| Crate capacity tier 1 | Bigger deliveries | Moderate — pairs with production | Shipments keep backing up |
| First ammo unlock | New round type craftable | High if orders appear | Crate board already shows demand |
| Press automation | Less manual input per round | Very high — compounds | You can afford it without stalling |
For most players, the strongest opening is press speed into crate capacity, then automation, then ammo unlocks in whatever order the crate board demands. The reasoning is straightforward: automation changes the shape of the game from manual labor to managed production, and everything after that is optimization.
If you want a deeper breakdown of which workshop purchases deserve your coins first, the BRASS HELL upgrade priorities list ranks them against real progression bottlenecks rather than raw price. Pairing that ranking with this unlock route gives you a complete buying plan instead of a piecemeal one.
Solo Play Versus Long Sessions
Session length changes the math slightly. Short sessions favor throughput upgrades because they pay back immediately within the same shift. Long sessions favor unlock upgrades because the matching crate orders have time to cycle in and convert the new ammo into sustained income. Neither approach is wrong — they simply suit different play patterns, and knowing which one you are doing prevents buyer's remorse.
Ammo Tiers and the Order Board Connection
The relationship between ammo tiers and the order board is the part of BRASS HELL that most players under-plan. Rounds exist to fill crates, and crates exist to generate cash, so an ammo tier is only as valuable as the orders it attracts.
| Ammo Tier | Relative Value per Unit | Order Frequency | Unlock Timing |
|---|---|---|---|
| Basic rounds | Low | Very high — always in demand | Available from the start |
| Tier 2 rounds | Medium | High once unlocked | After early workshop milestones |
| Tier 3 rounds | High | Moderate — appears in waves | After mid-tier workshop purchases |
| Higher tiers | Highest | Situational | Late progression |
The pattern is that higher tiers pay more per unit but appear less consistently on the board. That makes them excellent for burst income and poor for steady baseline production. A healthy factory runs a mix: basic rounds to keep shipments flowing during quiet stretches, higher tiers to capitalize when a lucrative order appears.
Community gameplay footage, such as the Tryhard_Playz BRASS HELL run, shows players hand-building large quantities of rounds on the press, which illustrates the manual-crafting pitch the game starts from. Watching a full press-and-crate cycle before your own session is a fast way to internalize how much automation actually saves you.
Matching Unlocks to Demand
Before buying any ammo unlock, look at what the board is asking for. If tier 2 rounds are appearing in orders you cannot fill, that unlock is worth buying now. If the board is still entirely basic rounds, the unlock can wait while you invest in throughput. This demand-first approach prevents the classic early-access mistake of buying unlocks that sit unused.
Managing Early-Access Balance Changes
BRASS HELL is explicitly an early-access title, and that status has real consequences for anyone planning a long upgrade route. Costs, unlock conditions, and even round values can shift between patches, so a rigid plan built on one build's numbers will eventually mislead you.
Practical habits for staying current: check the BRASS HELL workshop screen itself after every patch rather than trusting a screenshot of old round unlock prices, and log what each ammo tier actually costs you in scrap and cash before committing. Because early-access balance passes can quietly move a round's unlock milestone or reprice an upgrade tier overnight, treat any community-posted figure as a range and re-verify it in your own save. Fast-payback compounding upgrades — the ones that boost scrap or cash generation — tend to survive these shifts, while a nerf to a specific ammo tier can strand every credit you sank into chasing it.
-
Re-read the workshop after each update rather than assuming last week's prices hold.
-
Treat community-reported costs as ranges, not fixed figures.
-
Prioritize upgrades that pay back quickly, since fast-payback purchases survive balance changes better than speculative ones.
-
Keep a cash buffer so a newly cheap upgrade does not catch you empty-handed.
-
Watch for unlock condition changes, not just price changes — a milestone may move earlier or later.
The reason this matters is structural: in an incremental game, compounding investments are the engine of progression, and a balance pass that cheapens automation makes an already-strong purchase even stronger. Conversely, a nerf to a specific ammo tier can strand cash you spent chasing it. Buying compounding upgrades first is the most patch-resilient strategy available.
What to Do After a Patch
When an update lands, spend one shift doing reconnaissance rather than optimization. Check the workshop prices, check which round types the board requests, and check whether your existing upgrades still behave as expected. One shift of observation saves several shifts of misdirected spending, and it keeps your unlock route aligned with the build you are actually playing.
Putting the Unlock Route Together
The full picture is simpler than the shop interface suggests. Rounds unlock through workshop milestones, throughput and capacity upgrades pay for themselves continuously, and ammo unlocks convert to income only when the crate board demands them. Buy compounding upgrades first, follow the order board for ammo timing, and re-check the workshop after every patch.
For a full ranking of round types by practical value once you have them unlocked, the BRASS HELL round unlocks list breaks down which ammo deserves your early investment and which can wait. Combining that with the milestone route above gives you a buying plan that survives both early-access patches and your own shifting session length.
Frequently Asked Questions
How do I unlock new rounds in BRASS HELL?
Rounds unlock through workshop purchases rather than playtime or manual packing. Buy the workshop milestone tied to the ammo tier you want, and the round type becomes craftable at the press. Because the game is in early access, unlock conditions can shift between patches, so re-check the workshop after each update before committing cash.
What should I buy first in the workshop?
Press speed tier 1 followed by crate capacity tier 1 is the most reliable opening, since both pay back within a few shipments. Save for press automation next, because it reduces manual input on every round you produce afterward and compounds with every later upgrade you purchase.
Are BRASS HELL upgrade costs fixed?
No. The game launched in early access on October 4, 2026, and the developer actively retunes values between updates. Treat any cost list as an approximate range and verify current prices in the workshop before planning a long purchase route, especially after a patch drops.
Do higher ammo tiers always earn more?
They earn more per unit but appear less consistently on the crate board. Higher tiers are strong for burst income when a lucrative order shows up, while basic rounds keep shipments flowing during quiet stretches. Running a mix of tiers produces steadier cash than chasing the highest tier exclusively.
Can I unlock rounds without buying throughput upgrades?
Technically yes, but it is inefficient. Unlocking an ammo tier without the production speed to supply it leaves you hand-packing slowly for orders you cannot fill. Throughput upgrades multiply the value of every unlock you buy afterward, which is why they belong earlier in the purchase order.