
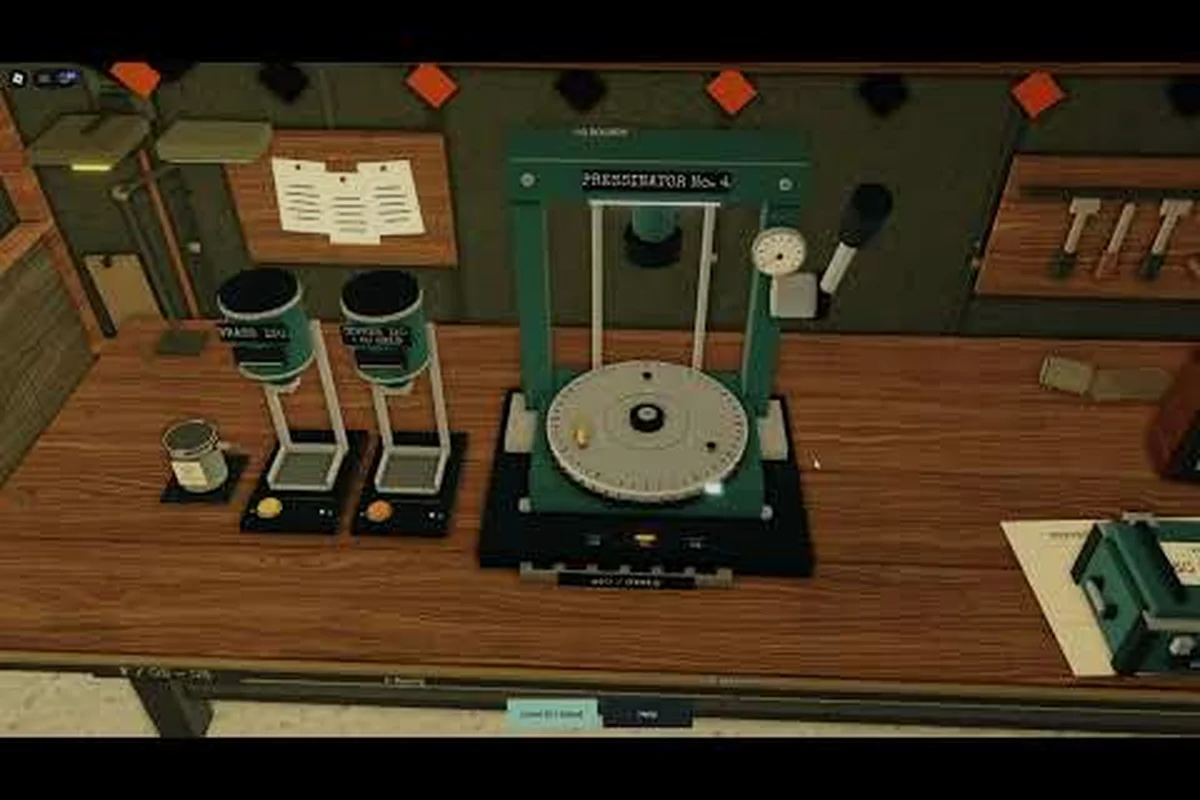
A BRASS HELL round unlocks list matters because each workshop purchase can add a new ammo type, reshape your factory, and determine which enemies become easier to handle. This guide organizes the unlocks by practical value so you can spend wisely from the first factory expansion onward.
BRASS HELL Round Unlocks List Overview
The BRASS HELL round unlocks list follows a simple economic loop: earn money from production, purchase ammunition in the workshop, then test the new round against tougher enemies. That loop creates a major upgrade-efficiency decision. A round is not automatically valuable merely because it is newer; its worth comes from damage, usefulness against specific threats, production compatibility, and how easily it fits your existing machine layout.
Community reports and available upgrade data should be treated as a practical progression reference rather than a promise of one universal build. Enemy behavior, stage objectives, and the exact numbers visible in your version determine the best purchase at a given moment. The order below therefore emphasizes Workshop Value, Immediate Utility, and Factory Fit instead of presenting an arbitrary rarity ranking.
| Priority | Round unlock category | Main benefit | Best time to purchase |
|---|---|---|---|
| First priority | Basic starter ammunition | Replaces missing production capacity | Immediately after earning enough cash |
| Early priority | Versatile general-purpose ammunition | Handles several common enemy groups | First comfortable income surplus |
| Midgame priority | High-impact specialist ammunition | Improves performance against tougher threats | After the basic factory is stable |
| Late priority | Expensive premium ammunition | Delivers major power once income is strong | When specialist demand outweighs cost |
| Optional priority | Narrow-use ammunition | Excels against a limited enemy category | Only when that enemy type appears often |
Reading the list by production value
The best unlock is the one that solves your current bottleneck without making another part of the factory awkward. If your machine handles quantity but struggles against armor, prioritize a round that improves relevant damage. If armor is not an issue and your real weakness is production speed, a round that flows cleanly through the current layout may deliver more value.
This distinction prevents a common mistake: saving every coin for an expensive upgrade while the basic factory earns poorly. A smaller unlock can raise throughput, improve survival, and create the cash needed for a later purchase. In other words, the optimal order is often a sequence of modest improvements rather than one dramatic leap.
| Factory situation | Most sensible next unlock | Why it has priority |
|---|---|---|
| Low cash after the opening stage | Basic production round | Restores a reliable income loop |
| Steady income but weak crowd control | General-purpose ammunition | Improves consistency across several threats |
| Stable production but poor performance against durable enemies | Armor-oriented specialist round | Targets the clearest combat weakness |
| Strong cash flow with an open machine slot | Premium ammunition | Adds power without destabilizing the factory |
| Plenty of money but limited physical space | Compact production improvement | Prevents clutter and unnecessary complexity |
The practical BRASS HELL all rounds unlock approach is therefore iterative rather than rigid. Keep enough reserve to repair damage or maintain the factory when needed, but purchase another round when the next round solves a demonstrated problem. The workshop tier list can help compare the final performance of ammunition, while this guide focuses on when each unlock becomes worth buying.
BRASS HELL All Rounds Unlock Order by Value
A useful BRASS HELL round unlocks list must separate purchase timing from raw power. The first several purchases should create a stable economy; later purchases should improve the output of an already functioning system. This order prevents expensive ammunition from becoming a liability when your factory still lacks reliable money generation.
Stage 1: establish basic income
The opening stage of factory progression should prioritize the baseline ammunition needed to maintain production. Its exact effects are less important than continuity because every later decision depends on a dependable flow of money. Buy it as soon as the available cash comfortably exceeds the initial reserve required to keep operating.
At this point, resist buying several overlapping rounds. Two rounds that occupy the same machine position rarely double your efficiency if they deliver similar damage or operate at the same speed. Instead, identify the production bottleneck, test one change, and observe whether money income improves before expanding further.
| Early factory goal | Unlock decision | Result to measure |
|---|---|---|
| Restore basic output | Purchase the cheapest required ammunition | More reliable cash income |
| Correct a weak stage | Buy the round suited to that stage | Better completion consistency |
| Improve uptime | Resolve space or routing issues before another expensive purchase | Fewer idle production slots |
| Test a new option | Delay the premium round and buy one versatile upgrade | Clearer comparison at lower cost |
Stage 2: add versatile combat power
Once basic production is stable, the next purchase should usually improve combat efficiency across multiple common enemy types. A versatile round is valuable because it reduces the need for context-specific answers while your machine layout is still being refined. Its practical benefit often exceeds that of a specialist round with higher theoretical damage.
The BRASS HELL what rounds to unlock first question has a practical answer: buy the starter option that unlocks the economy, then choose the broad general-purpose upgrade that supports the widest range of encounters. This creates a cleaner foundation than rushing toward a round whose benefits are difficult to exploit.
| Consideration | General-purpose round | Narrow specialist round |
|---|---|---|
| Enemy coverage | Broad | Limited to selected threats |
| Learning demand | Low | Requires recognizing threat patterns |
| Factory footprint | Usually easier to standardize | May demand a specialized placement |
| Early-game value | High | Situational |
| Best timing | After basic income is stable | After the related enemy becomes a recurring problem |
Stage 3: buy specialist ammunition for proven threats
Specialist rounds become attractive when repeated stages show the same weakness. If one enemy group consistently drains your health, stalls production, or damages key equipment, its counter-ammunition can produce more value than a general upgrade. The key signal is repeated evidence, not fear of an unfamiliar enemy that appears only once.
Use the round unlock guide when you need the exact purchase sequence and available workshop entries. For deciding whether a specialist is worthwhile, compare four factors: how often the enemy appears, how long it takes to defeat, how much damage it causes, and whether your current ammunition remains competitive against everything else.
| Specialist trigger | Upgrade response | Efficiency benefit |
|---|---|---|
| A durable enemy repeatedly survives standard rounds | Purchase armor-oriented ammunition | Faster removal of the main threat |
| Small enemies arrive in dense groups | Select ammunition with improved area pressure | Fewer missed production opportunities |
| Fast enemies interrupt the factory | Improve control or targeting performance | More uninterrupted production time |
| A specific boss threatens progression | Buy the specialist option immediately before saving | Higher success rate on a costly stage |
| The specialist has little effect | Keep general ammunition | Preserve cash and machine simplicity |
BRASS HELL What Rounds to Unlock First
The most important early unlock is the one that restores or stabilizes cash generation. A stronger round cannot replace missing income if the factory remains too slow to afford the next upgrade. This is why Production Continuity outranks raw damage in the opening purchase order, even when a premium round looks more exciting.
Calculate the real cost of an unlock
The visible purchase price is only one part of the decision. An efficient upgrade also needs available space, must not idle because of poor routing, and should solve a problem that occurs often enough to repay its cost. Consider the total setup time as part of the purchase rather than treating every slot as equally valuable.
For example, two ammunition types may have the same price, but the one that fits your existing production route may generate money sooner. The costlier option could win later if it handles a common armored enemy, although that benefit should be based on recurring encounters rather than a single difficult stage.
| Cost category | Question to ask | Example response |
|---|---|---|
| Purchase price | Can the factory repay this without slowing the next upgrade? | Yes, after one stable earning cycle |
| Space | Does the round fit without removing useful production? | It occupies one available slot |
| Routing | Will inputs and outputs move cleanly? | Yes, it joins the existing flow |
| Combat demand | Does it solve a common problem? | It counters a frequently encountered enemy |
| Maintenance | Will the configuration remain stable under pressure? | Yes, no constant repositioning is needed |
Use a three-round test cycle
A disciplined cycle helps control overspending. First, buy the round that improves your clearest bottleneck. Second, observe it through several normal stages instead of judging it from one room. Third, compare income, clear speed, and downtime against the previous configuration. This gives you evidence before committing to a larger reconfiguration.
The upgrade order guide expands on workshop layout and purchase priority. The key BRASS HELL upgrade efficiency rule is simple: change one major variable at a time whenever possible. Otherwise, a gain in damage may hide a loss in throughput, making the upgrade appear worse than it really is.
| Observation period | Keep | Change |
|---|---|---|
| First earning cycle | Basic production and one new round | Nothing unrelated |
| Second earning cycle | Stable settings from the first cycle | Only one specialist test |
| Third earning cycle | The configuration producing the best result | Redundant or poorly routed ammunition |
| After evaluation | A recorded upgrade order | Another expensive purchase |
BRASS HELL Upgrade Tips for Workshop Progress
Good BRASS HELL upgrade tips combine purchasing discipline with factory organization. The best round cannot perform well if it is surrounded by unused machinery, tangled routing, or production gaps. Workshop improvement is therefore a sequence: stabilize income, identify a repeated problem, purchase the relevant round, and then refine its position.
Preserve a practical cash reserve
Keep a reserve before buying an optional round. The purpose is not to hoard indefinitely; it is to protect your ability to recover from a costly failed stage or replace a poorly performing purchase. A reserve also gives you flexibility when a new enemy pattern changes the value of your current ammunition.
The correct reserve depends on your progress, recent losses, and income rate. Rather than relying on a fixed universal number, use three checkpoints: one that covers normal operating costs, one that covers a stage you have failed, and one that supports your next planned upgrade. This method is more reliable than sacrificing every coin for the newest round.
Prioritize utilization over collection
Owning several rounds does not automatically improve your factory. Each additional type may require another machine, input route, or operator decision. Every occupied slot should either generate money, survive repeated encounters, or support another productive component. If a round contributes little, sell or replace it when the game permits that option.
| Workshop audit | Strong result | Warning sign |
|---|---|---|
| Machine usage | Most useful slots remain active | Several machines sit idle |
| Round overlap | Each type handles a distinct need | Multiple rounds perform the same task |
| Input flow | Materials reach production consistently | Bottlenecks cause visible starvation |
| Cash income | Profits support the next planned purchase | Every upgrade requires the previous profit |
| Survival | Standard rounds clear recurring threats | One enemy type repeatedly resets the factory |
Match ambition to the next income tier
Major upgrades feel better when the economy can support them. Before buying a premium round, ask whether the factory has reached the stage where it can repay the investment without reducing essential production. Sometimes buying two inexpensive improvements produces more cash than one expensive upgrade because each one increases usable capacity.
Community experience consistently favors experimentation, but that does not mean random purchasing. Keep a short record of each configuration, note the stages where it performs well, and compare income. A modest round that raises output across several stages can be more valuable than a premium option that shines only during a narrow encounter.
BRASS HELL Workshop Tips for Late Unlock Efficiency
Late-game efficiency depends on completing a coherent factory rather than collecting isolated bonuses. By this point, basic ammunition has already done its job. The remaining choices should sharpen your strongest income loop, cover threats that break it, or free space for another productive machine. This is where upgrade value becomes less linear.
Build around a proven production engine
Choose a small number of rounds and machines that reinforce the same profitable flow. A late upgrade is stronger when its output can feed another profitable stage, because that creates compounding value. A round that produces a large quantity of unused material is less efficient than one that improves an input your factory already needs.
Compare the whole chain rather than individual output numbers. Track where materials begin, which machine transforms them, where the profitable ammunition or product emerges, and which enemy disrupts that route. A high-value upgrade may be the one that protects the busiest stage for even a modest increase in damage.
| Late-game goal | Best upgrade direction | Efficiency test |
|---|---|---|
| Multiply income | Improve the strongest existing chain | Does additional output sell or unlock income? |
| Reduce losses | Protect the stage that fails most often | Are fewer resources lost per run? |
| Open capacity | Free an occupied slot | Does the new machine contribute income? |
| Handle a boss | Add a specialist round temporarily | Does it improve stage completion? |
| Simplify control | Remove duplicate ammunition types | Can you make faster tactical decisions? |
Re-evaluate specialists when enemies change
A specialist that performs poorly in one early stage may become essential later. Conversely, a premium general-purpose round may become redundant once your factory can survive threats through stronger production and positioning. Review the roster of enemies that actually block progress rather than preserving an unlock because it was expensive or difficult to obtain.
The bullet tier comparison is useful for judging output characteristics, but progression value still depends on your route. Compare ammunition only after noting what your current rounds fail to handle. That process keeps purchases tied to actual factory needs rather than an abstract “best ammo” label.
Confirm Repayment and Where the Round Operates
A reliable BRASS HELL upgrade efficiency checklist has two halves: financial and mechanical. Financially, confirm that you can repay the purchase. Mechanically, confirm that the new round can operate where it is needed. If either answer is no, keep earning, rearrange the workshop, or buy a smaller solution.
Review Cash and Machine Slots First
Review the current cash balance, identify the next planned upgrade, and subtract the amount needed for operating stability. Then examine the machine layout. Is there an open slot? Can the ammunition be routed into the existing production chain? Will the purchase remove a useful machine? These checks cost no money and prevent the most expensive mistakes.
| Pre-purchase question | Green light | Delay the purchase |
|---|---|---|
| Can the factory repay this? | Stable income covers the cost | The purchase would consume all reserves |
| Is there a clear need? | A recurring enemy or bottleneck exists | The round is only speculative |
| Does it fit? | Available space and routing support it | A useful machine must be removed |
| Is the timing right? | Current income matches the tier | A smaller upgrade should come first |
After the purchase
Run enough ordinary stages to gather a useful sample. A first-stage result can be distorted by enemy placement, while a short series better shows typical performance. Record whether cash income changed, whether the round solved its intended problem, and whether any secondary weakness became more noticeable.
If the upgrade performs poorly, diagnose before replacing it. The problem may be routing, space, enemy behavior, or simply poor timing rather than the ammunition itself. This diagnostic step saves money and prevents a chain of speculative purchases.
Final progression review
Review your workshop after each major stage. List every round, its purpose, its occupied slot, and the enemy or production task it serves. Remove duplicates where possible and identify missing coverage. Then compare the next workshop offer against that list.
This process makes the BRASS HELL round unlocks list actionable rather than theoretical. It also ensures that your next purchase improves the factory as a whole. If you want a broader comparison after the basic economy is secure, the best rounds to unlock analysis can help compare stronger late-game choices.
Frequently Asked Questions
What is the first round to unlock in BRASS HELL?
The first useful purchase is the basic ammunition needed to stabilize factory income. Its exact position can depend on your available workshop purchases, but restoring production is the priority because every later upgrade depends on cash flow. Avoid spending that money on a premium option before the basic round solves an immediate opening-stage problem.
Should every round be unlocked immediately in BRASS HELL?
No. Unlock ammunition only when it fills a clear combat or production gap, and only when your machine layout can support it. Several early rounds may overlap, while a specialist can become highly valuable later against a recurring enemy. Test purchases in sequence so you can identify which configuration actually improves income, clear speed, and downtime.
How do I choose between a general round and a specialist?
Choose the general round when several enemy groups are causing trouble or when your factory needs flexible coverage. Choose the specialist when one threat repeatedly stops production or defeats your current ammunition. Compare expected frequency, damage output, machine space, and repayment speed rather than relying only on a theoretical damage ranking.
What makes a BRASS HELL round unlock efficient?
An efficient unlock solves a repeated problem, fits the current factory, and repays its purchase through better production or clearer stages. Keep a reserve for recovery, avoid duplicate ammunition, and test one major purchase at a time. This approach improves upgrade efficiency because you can identify which change caused the result instead of reacting to several variables at once.