
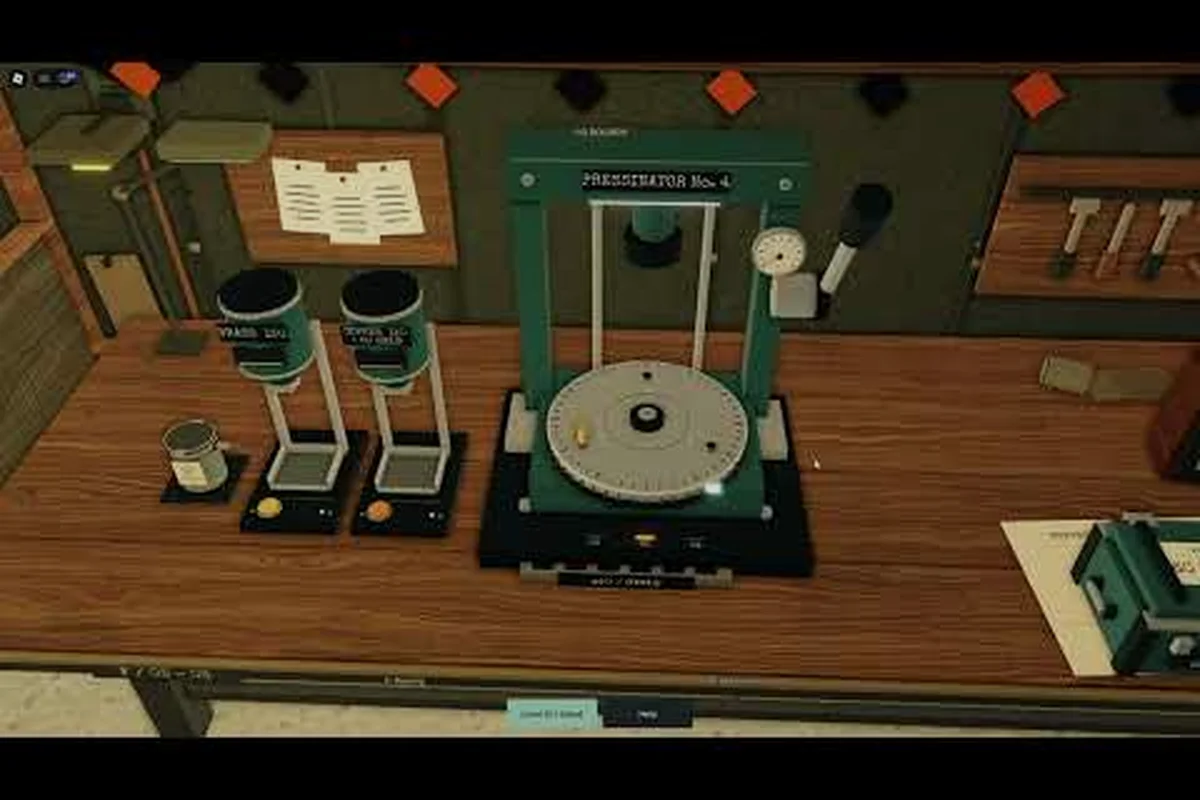
Crate filling is the quiet bottleneck in BRASS HELL, and this crate guide shows you how to pack finished rounds while the press is still cycling so your output per minute climbs instead of stalling. The official page describes a three-step loop — work the press, fill crates, push shipments out the door — and the middle step is where most players lose time. Get packing right and every round you craft actually counts toward a shipment.
Why Crate Packing Decides Your Ammo Output
The press does not run itself. According to the official BRASS HELL page on Roblox, crafting is a hands-on loop: you load the press, operate it to produce rounds, then carry those finished rounds to crates on the factory floor. Because each stage needs your hands, the only way to raise throughput is to overlap stages instead of running them one after another.
That means the real skill in this game is not pressing faster — it is packing during the press cycle rather than after it. Players who wait for a full batch before touching a crate spend half their session walking. Players who pack in the gaps keep the shipment queue moving.
-
Press time is dead time unless you fill it with packing
-
Crate capacity caps how many rounds a single trip is worth
-
Shipment pacing determines whether finished rounds sit idle on the floor
-
Travel distance between press and crate is pure overhead you can shrink
Community gameplay from Tryhard_Playz on YouTube shows the hand-built volume players reach when they chain press work into crate filling without pause, which is a useful visual reference for the rhythm described below.
The Three-Stage Production Chain
| Stage | Your Action | Bottleneck Risk | Fix |
|---|---|---|---|
| Press | Load and operate the press | Low — short cycle | Batch loads, don't idle |
| Crate | Pack finished rounds | High — travel + capacity | Pack during press cycle |
| Shipment | Push crates out the door | Medium — queue backup | Ship at capacity, not later |
The table above is the whole game in miniature. Stage two is where a session either flows or grinds, and every tip in this guide targets it. The reason is mechanical: the crate stage is the only step that chains two separate timers — round travel time from the press output to the packing bench, plus the crate's fixed capacity before it can be sealed. If you wait for the press to finish before walking rounds over, those two timers run back-to-back and the bottleneck risk jumps from Low to High in a single cycle. Packing during the press cycle overlaps them instead, which is why the fix column reads "pack during press cycle" rather than "pack faster" — the speed of your packing animation never changes, only when you start it. Watch your crate fill meter against the press progress bar: when the meter is roughly two-thirds full at the moment the press completes, you are overlapping correctly; if the meter is empty when the press finishes, you are losing a full travel window every cycle.
BRASS HELL Crate Guide: Packing While the Press Cycles
The core technique is simple to describe and takes a few sessions to internalize: start a press cycle, and while it runs, walk to the nearest crate and pack whatever finished rounds are already on the floor. By the time you return, the press has produced more. You never stand still watching a progress bar.
This is the single biggest BRASS HELL crafting tip for anyone past the first hour. Standing at the press is comfortable, but comfortable is slow. The press keeps working whether you watch it or not, so watching it is wasted labor.
How to Load Rounds Without Breaking Rhythm
Loading rounds into crates is a physical action in the world, not a menu, so every second spent walking to a crate is a second your press sits idle. That matters because packing speed is gated by travel distance and animation timing rather than a hold-to-fill prompt — if your crate is across the room, you lose the reload window entirely. A few habits make the motion automatic:
-
Park crates close to the press so the walk is short and repeatable
-
Pack partial batches instead of waiting for a full stack — partial packing keeps your hands busy during short cycles
-
Finish a crate before starting a new one so you never lose track of which crate is nearly full
-
Keep one crate open as a buffer while others wait for shipment
Treat the crate as a second workstation, not a storage bin — position it so the pack animation overlaps the press cycle instead of interrupting it. If you find yourself making dedicated trips just to pack, your layout is costing you rounds: each round-trip burns a reload window you could have spent seating bullets, and on tight ammo-crafting runs those lost windows compound into a shortfall by the time the shipment timer expires. Anchor the crate within arm's reach of the press and load rounds during the press's cooldown frames, so packing partial batches becomes part of the crafting rhythm rather than a separate errand.
Crate Capacity and Batch Sizing
| Crate State | Best Action | Why |
|---|---|---|
| Empty | Start packing immediately | No reason to delay |
| Half full | Keep packing during press cycles | Efficient use of dead time |
| Nearly full | Finish it, then queue shipment | Avoid overflow waste |
| Full and waiting | Ship before packing more | Prevents floor backup |
Batch sizing follows from this: pack in whatever increments your press cycle allows, and let crate capacity — not your patience — decide when a batch ends. The crafting recipes list breaks down what each production step consumes, which helps you plan how many rounds a full crate is actually worth.
BRASS HELL Ammo Crafting Guide: Cutting Wasted Motion
Every second spent walking is a second the press could have been producing. Reducing motion is therefore the cheapest output upgrade available, and it costs nothing but a little planning. The developer profile for earlymoto102 confirms the loop stays manual by design, so efficiency comes from your routine rather than from unlocks.
Start by mapping your floor before you touch the press. Where does the press sit, where do crates spawn or get placed, and where do shipments leave? If those three points form a long triangle, you are paying a travel tax on every round — and that tax compounds fast. Say a full loop from press to crate to shipment exit and back takes twelve seconds of walking; across a hundred rounds that is twenty minutes of pure transit where the press sits idle. Trace the triangle once, then rearrange so the crate stack and the shipment exit both sit within a few steps of the press, collapsing the triangle into a tight line and freeing that dead time for actual bullet crafting.
-
Cluster crates within a few steps of the press
-
Keep the shipment exit on the same side as your packing station
-
Avoid crossing your own path when moving rounds from press to crate
-
Clear clutter so you never have to path around objects
Press-to-Crate Distance Comparison
| Layout | Approx. Walk per Batch | Rounds Lost to Travel | Verdict |
|---|---|---|---|
| Crates adjacent to press | Very short | Minimal | Best |
| Crates across the room | Medium | Noticeable | Acceptable early |
| Crates near shipment only | Long | Heavy | Rework layout |
Once your layout is tight, the packing motion becomes muscle memory and you can start layering in the next optimization: timing your crate trips to land exactly when a press cycle ends. Because the press runs on a fixed cycle, walking to the crate mid-press wastes the tail end of that cycle — you arrive, load, and return only to wait. Instead, watch the press progress bar and leave for the crate just as the final round is being seated, so the load and the finished batch coincide. This shaves the dead travel time off each batch and compounds across a full session, which is why adjacent crates make the timing window far more forgiving than the across-the-room layout.
BRASS HELL Reloading Guide: Timing Cycles to Packing Trips
Reloading the press and packing crates are two halves of the same rhythm. The players who pull ahead are the ones who treat a press cycle as a countdown timer for a packing run. Start the cycle, pack until it finishes, reload, repeat.
This is where a BRASS HELL reloading guide earns its keep, because reloading is the moment you are most likely to fall out of rhythm. If you reload and then wander to a crate, you have inverted the order and lost the overlap. Reload first, then pack during the new cycle.
A Repeatable Cycle Routine
-
Load the press with the materials for the next batch
-
Start the cycle and note roughly how long it runs
-
Walk to the crate and pack finished rounds already on the floor
-
Return before the cycle ends so you are ready to reload immediately
-
Repeat, shipping any full crate on the way past the exit
The routine sounds mechanical, and that is the point — a mechanical routine frees your attention for spotting when a crate is about to overflow or a shipment is backing up. The hand crafting guide covers the press-side basics if you are still learning the loading step itself.
Cycle Timing Reference
| Cycle Phase | What You Should Be Doing | Common Mistake |
|---|---|---|
| Cycle start | Walk to crate | Standing at press |
| Cycle middle | Pack rounds | Checking inventory menus |
| Cycle end | Return to press | Starting a new crate |
| Reload | Load materials | Packing instead of reloading |
BRASS HELL Bullet Crafting: Keeping Shipments Flowing
Bullet crafting only pays off when finished rounds leave the building. A crate that sits full on the floor is worth nothing until it ships, and a floor full of full crates is a sign your shipment step is lagging behind your packing step.
The fix is to ship on capacity rather than on convenience. The moment a crate fills, it should be on its way out — not parked while you start the next one. Players who batch shipments for later tend to hit a wall where the floor is crowded and packing slows down simply because there is nowhere to put rounds.
-
Ship full crates immediately, even mid-cycle
-
Never let two full crates stack up if you can help it
-
Time shipments to the reload pause so you lose no packing time
-
Watch for floor crowding as an early warning sign
Packing vs. Shipping Priority
| Situation | Priority | Reason |
|---|---|---|
| Crate full, press running | Ship now | Frees floor space |
| Crate half full, press running | Pack | Uses dead time |
| Crate full, press idle | Ship, then reload | Nothing else to do |
| Two crates full | Ship both | Prevent backlog |
The automation guide is worth reading once your manual loop feels tight, since it explains how production stations change the packing math later on: once a station feeds brass and powder into your press automatically, the bottleneck shifts from crafting speed to crate turnover, and a full crate sitting on the floor blocks the next batch from queuing. That is why the table above treats "crate full, press running" as a ship-now trigger rather than a pack-now one — clearing the crate keeps the automated feed from stalling, and the packing window only opens when the press is mid-cycle and the crate still has room.
Common Crate Mistakes and How to Fix Them
Most slow sessions trace back to a handful of habits, and each one has a straightforward correction. None of them require unlocks or upgrades — just a change in how you sequence your actions. The underlying cause is almost always the same: dead time where the press, the bench, or the loading table sits idle while you wait on another station. A single wasted press cycle compounds across a full run, and because BRASS HELL ties output directly to how tightly you chain crafting and reloading steps, those gaps are what separate a smooth session from a stalled one. The fixes below target that idle time directly.
-
Watching the press — replace with packing during the cycle
-
Packing only full batches — replace with partial packing in gaps
-
Long walks between stations — replace with a clustered layout
-
Deferred shipments — replace with ship-on-capacity
-
Reloading after packing — replace with reload-first ordering
Symptom-to-Fix Table
| Symptom | Underlying Cause | Fix |
|---|---|---|
| Low rounds per minute | Press idle while you walk | Pack during cycles |
| Floor cluttered with crates | Shipments deferred | Ship at capacity |
| Constant backtracking | Poor station layout | Cluster press and crates |
| Crate overflow waste | No buffer crate | Keep one open crate |
If you fix only one of these, fix the first. Press idle time is the largest single loss in the loop, and it is entirely within your control. Every second spent walking between the press and your crate stack is a second the press produces nothing, and that lost output compounds across a full run — a 30-second idle per cycle over ten cycles is five minutes of zero bullet crafting. The fix is to treat packing as a background task: queue a batch at the press, then use the crafting window to sort and stack crates at your clustered station, so rounds accumulate while you work. Only return to the press when the queue empties.
Scaling Crate Output as Your Factory Grows
Early on, one press and a couple of crates are enough. As production grows, the packing step has to scale with it or it becomes the permanent limiter. The guide to how crafting works explains the broader production order, which helps you decide when to add capacity rather than just packing faster.
The practical rule is to add crate capacity before you add press capacity. A second press without more packing room just fills the floor faster. More crates, placed well, absorb the extra output without turning your session into a logistics puzzle.
-
Add crates before presses when the floor starts backing up
-
Keep the packing station central as the layout expands
-
Re-check walk distances every time you add a station
-
Ship in the same direction as production flows
Growth Checklist
| Milestone | Check | Action |
|---|---|---|
| Floor crowding | Crates full and waiting | Add crate capacity |
| Press idle often | Materials ready, no cycle | Reload faster |
| Long walks | Travel dominates cycle | Re-cluster stations |
| Steady output | Everything flowing | Hold the routine |
Once the routine is stable, growth becomes a matter of repeating the same loop with more capacity behind it. The rhythm you built at one press scales directly to several: each additional press needs its own steady feed of materials and its own crate buffer, so the bottleneck simply shifts from press speed to reload throughput and station spacing. Watch the same three signals from the checklist at higher volume — if floor crowding returns, add crate capacity before adding another press, since a backed-up crate line stalls the whole chain faster than a slow reload ever will.
Frequently Asked Questions
What is the fastest way to fill crates in BRASS HELL?
Pack finished rounds during the press cycle instead of after it. Start a cycle, walk to the crate, and pack whatever is already on the floor, then return before the cycle ends. This overlap removes the idle time that otherwise dominates a session and keeps shipments moving.
How many rounds should I pack per trip?
Pack in whatever increments your press cycle allows rather than waiting for a full batch. Partial packing during short cycles keeps your hands busy, and crate capacity — not your patience — should decide when a batch ends. Finish a nearly full crate before opening a new one.
Should I ship crates immediately or save them up?
Ship the moment a crate fills. Deferred shipments crowd the floor and slow packing because there is nowhere to put new rounds. Timing shipments to the reload pause lets you ship without losing any packing time during an active press cycle.
Does crate layout really affect ammo output?
Yes, significantly. Crates placed within a few steps of the press cut the walk time on every batch, and keeping the shipment exit on the same side avoids crossing your own path. A tight layout is the cheapest output upgrade available since it requires no unlocks.
When should I add more crates instead of another press?
Add crate capacity first whenever the floor starts backing up with full crates. A second press without more packing room just fills the floor faster and turns the session into a logistics problem. More well-placed crates absorb extra output cleanly.
Crate packing is the step most players overlook, yet it is the one that converts press time into shipped rounds. Overlap your packing with the press cycle, cluster your stations, ship on capacity, and reload before you pack — do those four things and your ammo output climbs without a single upgrade.